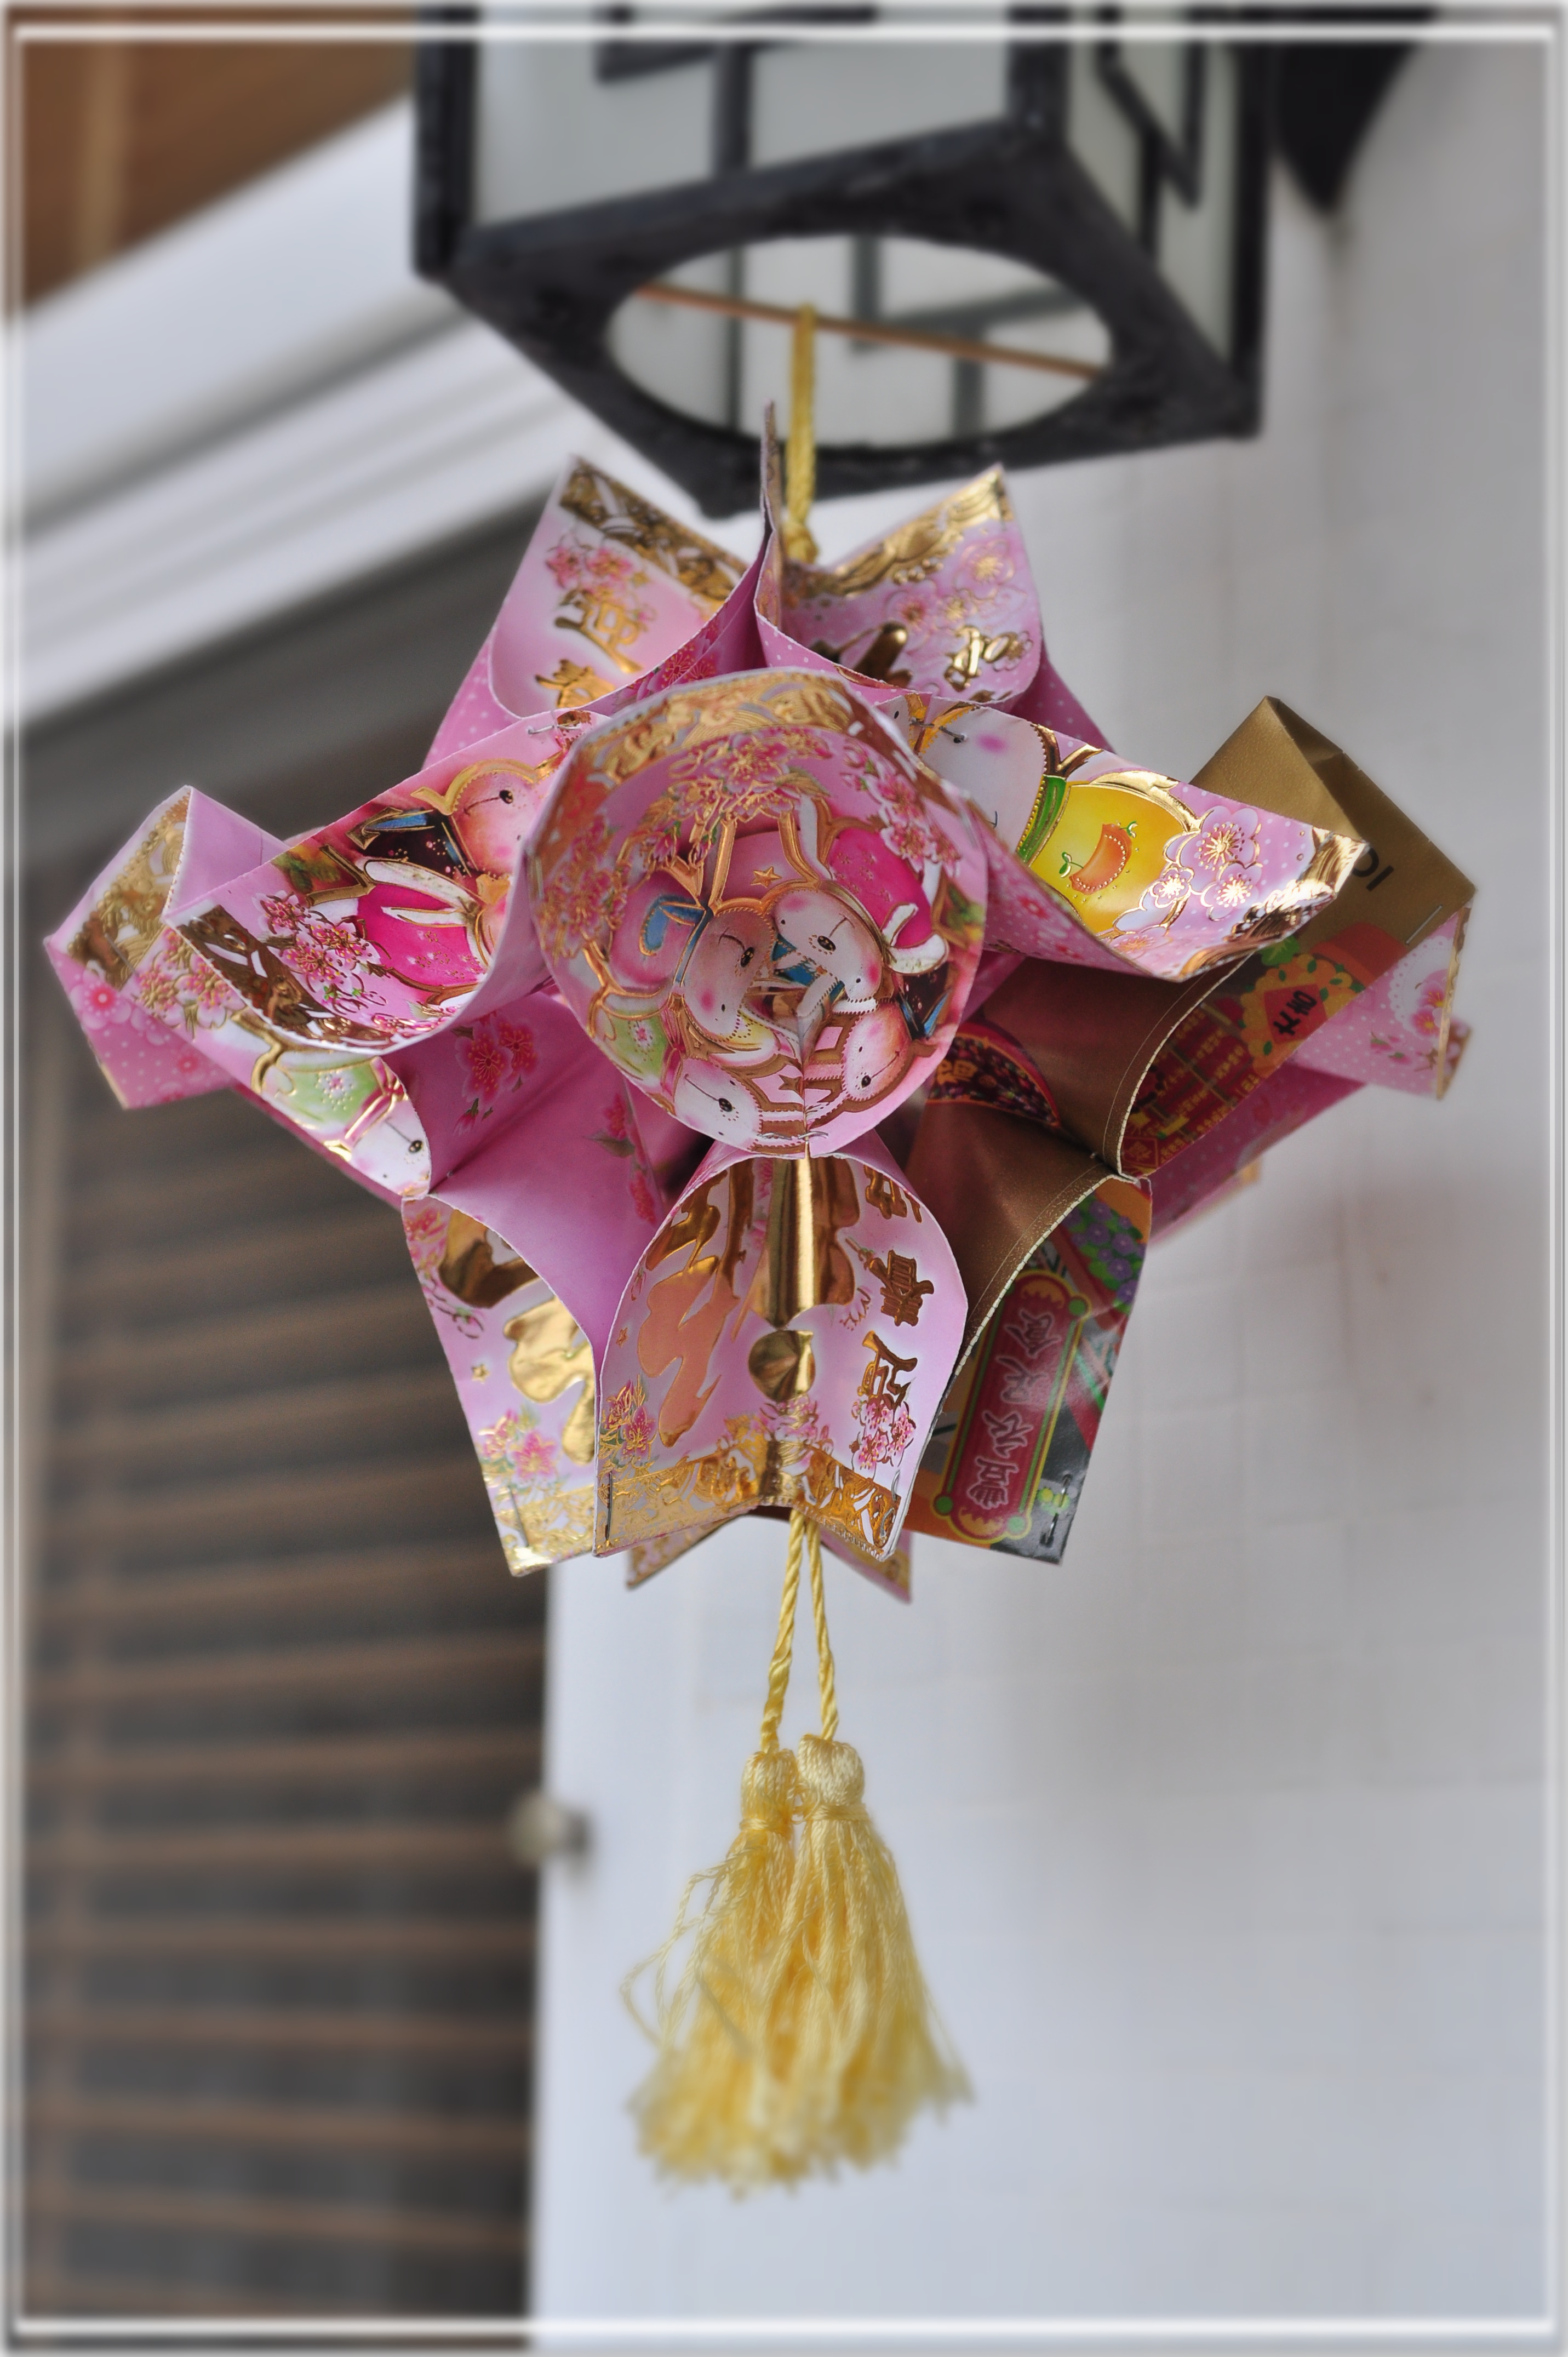
Red envelopes into lucky lanterns
By Choi Lai Kuen & Lo Kong Chun
What do you do with your lucky red envelopes after Chinese New Year? Some envelope recipients might keep them for senti- mental value, but more likely they will be thrown in the garbage.
K a n i s N g , b l o g g e r f o r K a n i s , s C h a p t e r s o f L i f e (KANIS的生活樂章), offers an environmentally friendly sugges- tion. Why not re-use the envelopes and turn them into artwork?
Ng has some ideas for creative ways that the envelopes can be recycled. They can serve as a greeting card or cut into square-shaped pieces and then transformed into origami.
Ng said that the underlying message is “mak – i n g t h e b e s t u s e o f s o m e t h i n g b e f o r e t h r o w i n g i t o u t . ”
The following are step-by-step instructions on how to make a paper lan- tern out of lucky envelopes. What you’ll need: (1) 10 to 12 envelopes (2) It is better to use a mix of envelopes that are used and new.

Materials needed for creating the lucky lantern: envelopes and stapler.

Step 1: Fold the red envelope in half from the longer side to create a crease.

Step 2: Unfold the red pocket and use a stapler to stick them together.

Step 3: For each red pocket repeat the same steps.

Step 4: Staple them at the edges and the in-folds as well.

Step 5: Repeat the above step once more and those pieces will become the top and the bottom of the lucky envelope lantern.

Step 6: Put the bottoms together and staple them alternatively together.

Step 7: Add decorations as you like and the lucky lantern is done.

Finished product of the lucky envelope lantern. (Photos: Kanis Ng)


